Showing posts with label stamping. Show all posts

Monday, January 31, 2011

Adventures in Babysitting

If you are ever in need of inspiration, check out the monthly classes at Two Peas in a Bucket. That's what I did for this layout. Actually, the inspiration for this layout came from two classes, namely Nichol Magouirk's Scrapbook Stamping and Jenn Gallacher's Stretch Your Sketch. Here's Jenn's sketch:
And here's my layout:

As soon as I saw the sketch, I thought of using this series of pictures. I just love how Thomas is studying the page of his book, then noticing something and asking Melissa about it!

The journaling reads: October 2010 -- Two or three nights each year, Melissa and I drive into Manhattan to babysit for Thomas. It's a win-win situation! Michael and Jennifer get a night out on the town while Melissa and I get some precious one-on-one time with Thomas. Reading stories, singing nursery rhymes, playing with blocks and trains is all an adventure when we do it with Thomas!

Nichol's challenge this month was to dig out the word or phrase stamps to create a title or border on a layout. I used Technique Tuesday stamps to stamp a border under the journaling. The stamp reads: This moment. This story. This day. This experience. This life.
I also stamped on a label sticker, layered it on another sticker and added a flower and some buttons to ground the pictures.
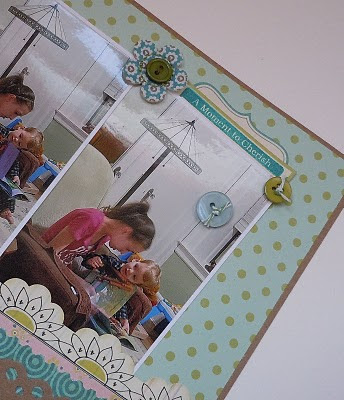
I love stamping and I love sketches so I think I will be playing along with Two Peas all year long!

Supplies:
Cardstock: Bazzill (Kraft);
Patterned Paper: Sassafras Lass (Indie Girl); October Afternoon (Farm Fresh); My Mind's Eye (Just Dreamy 2);
Stickers: Sassafras lass (Indie Girl); October Afternoon (Thrift Shop, Farm Fresh); Making Memories (Tiny Alphas); American Crafts Thickers; Basic Grey Bloomers (Pyrus);
Stamps: Technique Tuesday (Ali Edwards Today You, Little Labels ); Hero Arts (Design Accents: Patterned Hearts);
Ink: Stampin' Up! (Taken with Teal); VersaMark;
Tools: EK Success Edger Punch (Postage Stamp); Martha Stewart Edge Punch (Scallop Dot);
Misc.: Martha Stewart twine; Making Memories buttons (Chloe's Closet).

Sunday, December 27, 2009

Money Doesn't Grow On Trees!

Or does it?

I was inspired to create this card to hold or incorporate a gift (in this case, money) for a challenge over at the Hero Arts blog. You can go here (http://heroarts.com/blogs/club/2009/12/16/who-said-money-doesnt-grow-on-trees/) to read the original post and to get some great inspiration from Jennifer McGuire.

To create my card, I stamped the card base with VersaMark ink and then heat embossed with white embossing powder. After stamping the snowflakes and adding a little sparkle to the center of each with Stickles, I stamped the branch onto the blue diecut. I then folded my $20 bill in thirds and rolled it. I secured one end with a paper clip and the other with a piece of twine. Please note that no $20 bills were harmed in the making of this card. LOL! To finish off the card, I paper pieced the owls and affixed my wise "sweatered" friend on pop dots to add dimension.

These cards were a big hit on Christmas Day!

I have to say that this is the first time I have used Hero Arts acrylic stamps and I am now a huge fan! They inked up just as well as rubber stamps and they didn't require and conditioning. Like Technique Tuesday stamps, they are a high quality stamp made right here in the U.S.A.!
Supplies
Cardstock: Stampin' Up! (Kraft, Brocade Blue, Whisper White)
Stamps: Hero Arts (Designer Woodgrain, Owl Christmas)

Ink: Ranger (Jet Black); Stampin' Up! (Whisper White, Handsome Hunter); Technique Tuesday (Lava); VersaMark.
Markers: Stampin' UP! (Chocolate Brown, So Saffron)
Embossing Powder: American Crafts Zing (White)
Misc: Distress Stickles (Rock Candy); Bling (Recollections)
Tools: Cuttlebug, Spellbinders Nestabilities (Labels 1)

Friday, April 10, 2009

Sew Simple

Whether I'm reading the latest issue of a scrapbook magazine or visiting one of my favorite blogs, I find myself admiring pages and cards that incorporate sewing. I love the added texture and design element it gives to a project. I think that any combination of sewing and paper crafting is sew (pun intended) beautiful! So, I finally decided to take the plunge when I was doing my Pool Play page.

I wanted a clean look for this page since these pictures of a nighttime swim were a little on the dark side so I decided on white card stock. I only used two wavy strips of my patterned paper. (I find myself doing this more and more lately.) To lay out my pictures, I followed the principle's I learned from the CKC Scheming Around class and then used the white space on my grid for a hand-stamped title. It was only at this point that I felt the page still needed something. I added the brads but this still was not quite enough. That's when I decided to add some stitching. I used the swirls on the Bazzill In Stitchz flourishes template and voila, my page was finished. I'm happy with how my paper, stamps font and stitching all complement each other.

Since completing this page, I have taken my needle and thread out for another layout. I guess you can say that I'm sew hooked!
Ingredients: American Crafts card stock; Making Waves by Flair Design patterned paper; Autumn Leaves stamps; Stampin' Up! ink, Signo pen, Imaginisce brads; Bazzill In Stitchz flourishes template; Bazzill piercing tool, DMC embroidery floss.