In my last post, I mentioned another sweet baby boy that our family welcomed with love last fall. That's four great nephews, for anyone that's keeping count! And, they truly are great! I love spending time with these little guys and watching them grow. Anyway, I've been remiss in posting the card I created for Luke. Here it is:
I used the Onesie4baby stamp set from The Stamps of Life by Stephanie Bernard. i stamped the image twice -- once on the monkey paper and once on the solid orange. After fussy cutting the entire onesie image from the pattern paper, I cut the orange details and layered them on top. This stamp set comes with several different icons that you can use to decorate your onesie but I really wanted to use this monkey paper. As luck would have it, my choice was serendipitous since my niece decorated the nursery with jungle animals that included monkeys.
Below is a close-up of the onesie. You can see that I adhered it to the card using foam adhesive and used gems for eyes.
If you want to see another card I made using this stamp, click here.
Supplies:
Cardstock: Bazzill, Tim Holtz Core'dination;
Pattern Paper: Hey Boy;
Stamps: The Stamps of Life (Onesie4baby);
Ink: Color Box (Chocolate);
Tools: EK Success Border Punch (Postage Stamp);
Misc.: Recollection gems
Thursday, January 30, 2014
Friday, January 24, 2014
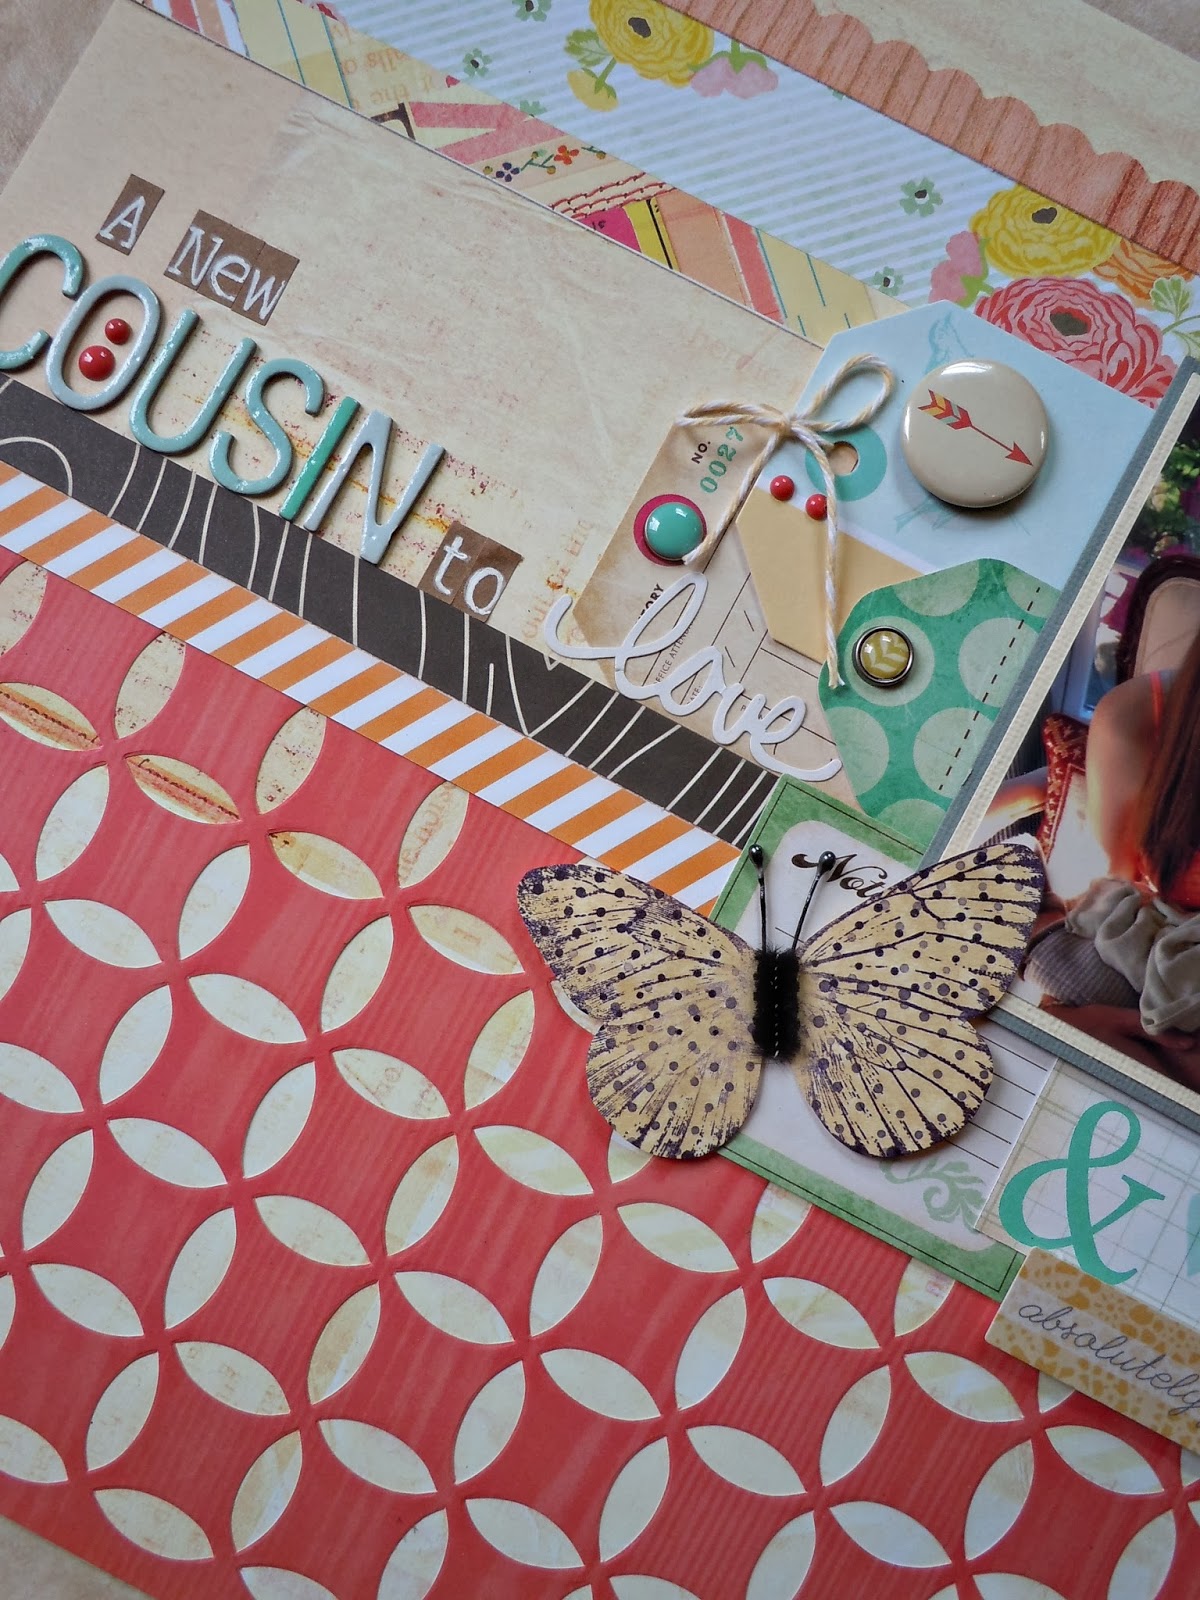
A New Cousin to Love
I am back with another layout to share. This one uses a couple of Studio Calico kits that I had gotten on sale. I loved creating with these kits. Keeping my choices limited and adding only a few elements from my stash made the process so much easier. It really made me think about joining a kit club. However, I can't even begin to justify that until I use up some of my stash. For now, I will just have to keep my eyes peeled for a sale. I think the next one should be before Mother's Day! Anyway, here's my layout:
I love this picture of Melissa with her new baby cousin, Nick. She has really grown up and is quite comfortable holding her baby cousin and playing with the older ones. I realized that I snapped this picture before adding the journaling to the label above the picture. Oops!
Below is a detail picture of all the tags and layers. I really loved the exclusive papers that were in these kits so I cut them in strips so as to feature them all!
Since this picture was taken last Spring, we have added another baby boy to our family tree! Be on the lookout for a layout featuring Melissa's newest cousin to love -- Baby Luke!
Supplies:
Pattern Papers and Embellishments: Studio Calico kits (Daydream Believer, Handmade);
Additional Embellishments: American Crafts Thickers: Dear Lizzy and Crate paper Tags; October Afternoon and My Mind's Eye label stickers; Jillibean Soup word sticker; Chic tags mini tags; Studio Calico wood veneer; My Mind's Eye enamel dots;
Tools: Fiskars border punch (Scallop Sentiment).
Friday, January 17, 2014
A Holiday Tradition -- Just a Little Late
This weekend I plan to scrap Christmas pictures so I thought I would get in the mood by sharing a layout I did of our 2012 Christmas card. For more years than I can remember, I have been sending a holiday newsletter to family and friends who live out of state. At the time I started this tradition, it sure seem to beat hand writing an update in 25+ cards. However, once I started making our cards instead of using store-bought cards, writing the newsletter started to seem like just one more thing that had to get done before the holidays. I try to keep the newsletter tongue and cheek so that I am not thought of as one of THOSE people. And, yes, it does take time to write -- time that I usually don't have around Christmas. However, what was begun for others, is now something I do for me. Every year Sal tells me to skip it and just get the cards mailed. But since I don't keep a journal and I don't scrap in chronological order, the newsletter is the only way I have of capturing a year full of memories on paper.
Since I have a file filled with newsletters, I thought it was time to make them into layouts. Here it is:
Since I keep my layouts in page protectors, I decided to change the margins of my holiday letter and print it on vellum. This makes it easier to read the letter without taking the page out of the book. (Click on the picture to embiggen if you want to read the newsletter.) With the exception of the thin strip of the black and red checkerboard (which is from an old Crate Paper collection), all of the papers are from the Echo Park collection -- the same collection I used to make the card.
I used my Cricut to cut the frame and negative for the word "Holiday" in my title, and then backed the mat with another paper from the collection. To complement the hand-stamping on the card, I stamped the word "Greetings" on the title piece. On the Special Delivery sticker, I stamped "Eterno-ly Yours" which is something I stamp in the back of all of my cards.
I added a touch of red with machine stitching around the vellum plus a piece of ribbon and some holly berries. Usually I believe in the Rule of 3s. This time, however, I felt that adding another spray of holly was overkill.
Here's a close-up of our holiday card as it appears on the layout:
And here's the inside of the card:
Thanks for visiting!
Supplies:
Cardstock (on Card): Papertrey Ink;
Pattern Paper: Echo Park, Crate Paper;
Stamps: Papertrey Ink; Hero Arts;
Ink: Ranger Archival black;
Sticker: October Afternoon;
Tools: Cricut Cartridge (December 25th); EK Success punch (Postage Stamp); Janome Sew Mini; Spellbinders Nestabilities (card);
Misc. Embellishments: Maya Road twine (on card); Stickles; DailyLike gingham fabric tape.
Thursday, January 9, 2014
Fusion #1
It seems that challenges have really been jump starting my creativity lately. Today's card is for the Fusion Card Challenge. You can either use the sketch, the photo, or both. I chose to use the photo. That red and blue pillow in the inspiration photo below was really calling my name. Here's the inspiration:
And here's my card:
I began by cutting and scoring a standard-sized card with a top fold. I don't know why, but I seem to gravitate towards top-fold cards. I embossed the card base with a Papertrey Ink embossing plate. (See below for a close-up look.) After cutting the blue pattern paper (from the Studio Calico Blue Note kit) down to size, I stamped the image using Versamark ink and heat set Zing embossing powder in Rouge. Using the red embossing powder on the blue pattern paper is something I never would have done if it wasn't for the challenge. Next, I rounded the corners on the stamped piece, matted it on a piece of cardstock cut slightly larger, adhered it to the card base using foam dimensionals and tied a double bow using a trick I found on Melissa Phillip's Make It Monday video at about 12:50.
Using the other throw pillows as inspiration, I added brown accents in the form of pearl gems, a wood veneer heart colored with a Spetrum Noir marker, and the stamped image. The sentiment is part of a two-line image. I masked the phrase I didn't want.
Thanks to the double bow and the wood veneer, this card required a padded envelope to mail to my niece for her birthday today. I am making some progress on my goal to FOCUS on mailing cards on time. At least this one got in the mail on her actual birthday. Baby steps!
Supplies
Cardstock: Papertrey Ink
Pattern Paper: Studio Calico Blue Note Card Kit
Stamps: Hero Arts (Classic Fabric Design); Mama Elephant for Studio Calico Blue Note kit (sentiment)
Ink: Versamark, Ranger Archival Ink (Coffee)
Misc.: Zing embossing powder (Rouge); Studio Calico wood veneer; Hug Snug washable seam binding (chalk white); Recollections gems
Friday, January 3, 2014
Wishing you JOY
I know I am a bit late but Merry Christmas and Happy New Year. Christmas preparations were a bit harried this year as I tried to deal with year-end deadlines at work, a shortened holiday prep season thanks to Thanksgiving falling so late, and, did I mention that both Mark and Sal came down with a virus a few days apart which had them each laid up with a high fever. Of course this meant extra laundry and bathroom cleaning as I hoped to keep Melissa and myself healthy for Christmas. Needles to say, with all of that going on, the old blog went neglected. But I am back with renewed vigor to give this blog some regular attention this year. After all, my One Little Word is FOCUS. That means in 2014 I will:
While I don't make New Year's resolutions, that is my intent for 2014. Wish me luck!
I will leave you with the Christmas card I made this year. After staying up until all hours of the night in years past, I kept it simple. I adhered a 4x6 photo to the front of a kraft card base and added the Papertrey Ink die cut. I let the Stampin' Up! glimmer paper shine all on its own. Here it is:
Thanks for reading! Happy New Year!
- Focus on eating better.
- Focus on exercising more.
- Focus on crafting more.
- Focus on blogging regularly -- at least once a week.
- Focus on finishing unfinished projects.
- Focus on trying new recipes.
- Focus on sticking to more regular work hours even though that is sometimes hard since I work from home.
- Focus on reading at least one book a month.
- Focus on pinning less and doing more.
- Focus on organization.
- Focus on deleting old e-mails so that my inbox never gets up to 1,500+ again.
- Focus on using more of my scrappy stash and buying less.
- Focus on mailing cards days early instead of days late.
- And, most importantly, focus on the people I love most -- my family.
While I don't make New Year's resolutions, that is my intent for 2014. Wish me luck!
I will leave you with the Christmas card I made this year. After staying up until all hours of the night in years past, I kept it simple. I adhered a 4x6 photo to the front of a kraft card base and added the Papertrey Ink die cut. I let the Stampin' Up! glimmer paper shine all on its own. Here it is:
Thanks for reading! Happy New Year!
Subscribe to:
Posts (Atom)


